Sunday, June 29, 2014

Update on progress: Overhangs, strapping, sheathing, and bird blocks.

It's been a long time since my last post, partly because of winter putting a damper on construction, and then afterwards once spring arrived, I was extremely busy trying to make up for lost time.
Here are two recent photos of the tiny house, which has been moved to a friend's driveway a few miles away to make it more convenient for LH to work on the inside, as I continue the outer shell.
Borrowed scaffolding is an absolute godsend!

The biggest news, perhaps, is that it no longer needs a tarp, as I have completed the sheathing, housewrap, and roof membrane, thereby making it waterproof. It was a glorious event to remove that huge tarp for the last time, fold it up, and retire it to the barn. (I would have burned it in a pagan ritual if it hadn't cost $330). I have also installed most of the metal roofing on the port side, and the cedar siding on one dormer cheekwall.
The color of the stained siding and the metal roofing look great together! LH has done a fantastic job of color selections.

Now, to go back in time and try to catch up on the construction sequence.

After the 1/2" roof sheathing was installed, I realized I had forgotten to build extensions to create an overhang on the bow and stern, so I cut open a portion of the roof (it's always fun to cut open something you just installed!) and added transverse 2x4's, which are cantilevered over the endwalls, attached to the nearest inside rafter, and have barge (or fly) rafters attached to their ends.


I then installed metal strapping (Simpson Coil Strapping CS-14) around the perimeter to help hold the house together while it's bouncing down the road. I didn't think this would be difficult, but the strapping was heavy and didn't like the idea of staying flat or straight, so I ended up using clamps to hold it in position for nailing.


Then came the 3/8" wall sheathing, which was interesting to do (mostly) singlehanded.  Using clamps, I tried to devise ways to help hold the sheets of plywood in position while they were attached.


Blocks of wood clamped to the trailer to hold the bottom row of plywood.

Blocks clamped to hold the upper row of plywood.
Since the framing wasn't always routine, I drew the location of each stud onto the plywood to help with fastener application.


For maximum rigidity, I chose to glue the sheathing to the framing members with construction adhesive, and used screws instead of nails to attach the sheathing.


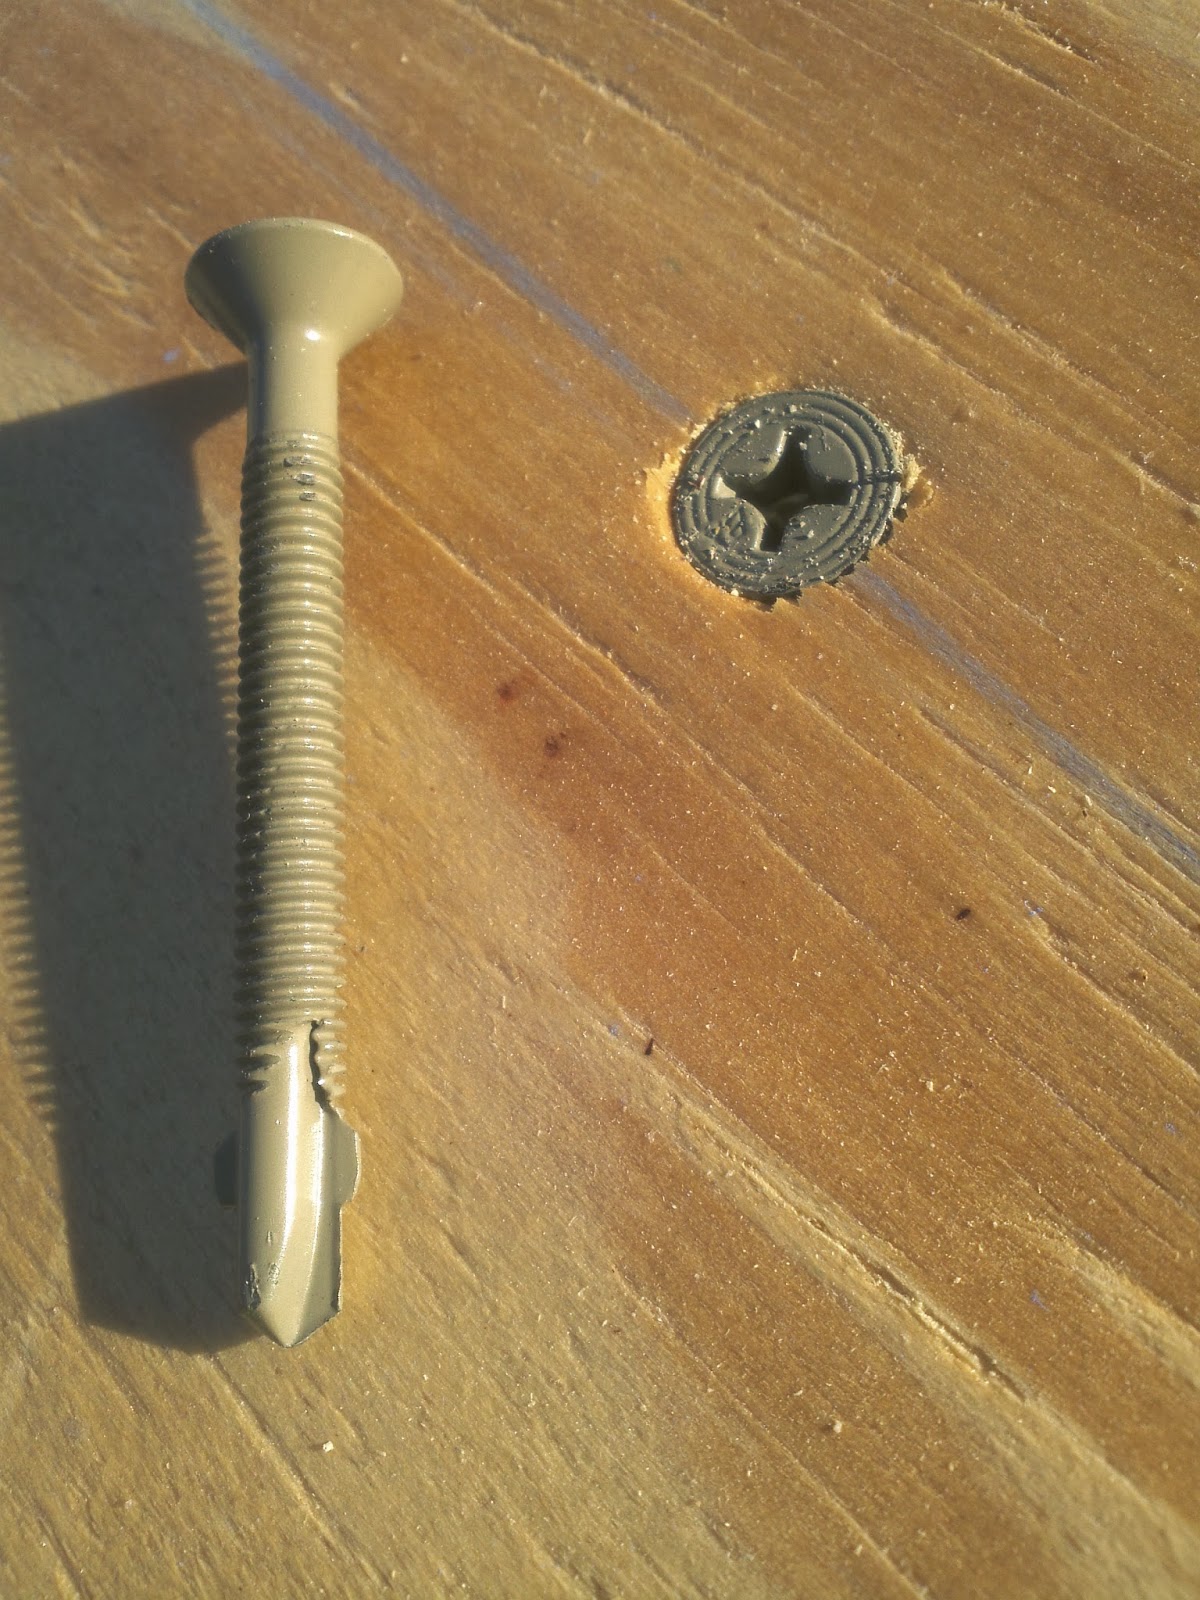
Proof of the screw's superior pulling and holding strength. I first used a nail gun to install 3" framing nails, and then came back and added screws afterwards, which pulled the plywood tighter against the framing, thereby leaving the nail protruding.


One thing that bugged me was the bulging of the plywood where it passed over the 1/8" thick coil strapping, a detail not mentioned in the plans. This could be avoided by placing the strapping into 1/8" recesses cut into the framing. I resolved it later by leaving a gap in the 1/4" thick furring strips where they pass over the strapping, as shown below.


Cutting the curve for the fenders was fun. From an arbitrary level line a couple of feet above the fender, I made vertical measurements down to the fender every 2", from the beginning of the fender to its flat top.


Best notepad around.


 I used these numbers to plot a curve onto the plywood, and then fine tuned it by trial and error.


The magic jigsaw, cutting all by itself.


After the initial cut, I placed the plywood against the fender and scribed the curve onto the plywood.

The finished product.


To mark the location of notches for the rafter tails, I placed a sheet of plywood as high as it would go up under the rafter tails, leveled and clamped it, hung a square on the edge, and scribed a plumb line on each side of the rafter tail.


Cut just wide of the lines to allow for wiggle room.


I cut just on the outside of the lines to allow extra room for maneuvering the large, relatively heavy sheets. The width of the gaps became progressively more generous each time I hoisted the plywood overhead, only to find that it wouldn't quite fit.


 I made cheap and easy bird blocks by cutting 2x4's to fit between rafters, notching them to allow ventilation, and nailing on aluminum vents (cut in half) to keep out critters.

outside face

inside face


screwed into place between rafters.


The fully sheathed tiny house!


Coming soon: Dormer window installation, nailers, Tyvek, roofing membrane, and more!

Tuesday, December 24, 2013

Framing progress!

Lots of progress has been made since my last post. It's been cold and snowy, and I've been working under a tarp a lot of the time. All four walls are up in this photo, although some studs have yet to be installed, in order to allow access to the hold downs.
Here's a close up of one of the 8 hold downs. The 5/8" threaded rod, which is welded to the trailer, comes up through a hole in the 2x4 sill. After installation of the wall, the hold down is lowered into place, screwed into the adjacent double studs with ten 1/4" lag screws, and then held down with a nut and lock washer. I don't think the wall will easily separate from the trailer! The studs next to the hold downs can now be installed.

A couple of days later we had some decent weather, and Marsha and I were able to install a few rafters and the ridge beam, which would be quite difficult to do alone.
A stack of identical rafters, awaiting installation. I made one, checked it for fit, and then used it as a template, tracing it onto each new piece of wood.

 Once the ridge beam is in place, the rest of the rafters go up rather easily. (Well, it would have been easier if I hadn't been under a tarp).
I was able to install most of the rafters while working under the tarp which, while a bit difficult, was easier than removing the circus tent sized tarp, which measures 30' x 50', and probably weighs close to fifty pounds. I try not to remove the tarp unless I have a nice long stretch of clear weather since it takes a lot effort to get it on and off. On sunny days, the heat accumulates under the tarp and I actually end up sweating, even though it may be only 15-20 degrees outside.
A week or so after the rafters went up, I had the double luxury of temperatures in the 30's, and the help of my son Doug who is home from college, 18 years old, strong, smart, and agile.
We got all the 1/2" roof sheathing on in just several hours, something which, again, would be very hard to do alone. We worked with the tarp on, and pulled it back to reveal one end of the house at a time.
Here's a little jig to help keep a piece of plywood in position for nailing. Just nail scraps of wood onto two rafter tails, and hammer them outwards if you need to adjust them.
The view from inside.
The rear portion (in this photo) will be the loft bedroom with 4 windows in the dormers, and the kitchen and bathroom below. The area in front (with the steep cathedral ceilings) will be the living room. Should be nice!

Sunday, December 8, 2013

Sills in place, and wall construction starts.

The trailer looks better after trimming the excess vapor barrier, and laying out (temporarily) the sills.
The plans called for a flat 2x4 header over the wheel wells (a 75" span), but since we are changing the design by adding dormers and increasing the length of the loft (which will increase the weight on the studs over the wheel wells) I built a double (vertical) 2x4 header, which I feel will be better able to handle the load.

Next, I removed the sills so I could begin laying out the walls.
Getting exciting! It will soon become much more three dimensional. Stay tuned!

Saturday, November 30, 2013

Sill seam, vapor barrier, and finally, plywood floor!

The following steps happened pretty quickly, and the wind was increasing steadily, so photos are a bit sparse.
After cleaning up the scraps of cured spray foam from the previous steps, and ensuring no insulation (or foam) was higher then the metal framing of the trailer, I applied sill seam (a flat, spongelike polyethylene material) to all the metal framing.
This will act as a thermal barrier to reduce the transfer of cold temperatures from the metal framing to the plywood subfloor. I just taped it down every few feet since the plywood, once installed, will hold it firmly in place.
Then came the plastic vapor barrier, as added insurance against moisture intrusion from below, with some 2x4's to keep it from blowing away until the plywood subfloors go down.
The 3/4" plywood sheets had already been cut to length, notched for the threaded hold-down rods and fenders,
and test fitted prior to the installation of the sill seam and vapor barrier, since the plywood is heavy and rough, and would have torn these softer materials. So suddenly, and somewhat anticlimactically, the plywood floors are finally, and gently, lowered into place (thanks Marsha!) and it looks like a trailer ready for a house!
I used #14 (which are 1/4" diameter) self tapping screws, 1 3/4" long, to fasten the plywood floor to the steel framing.
I was skeptical that they would pierce the nearly 1/4" thick steel framing without my first drilling a pilot hole, but lo and behold, they worked like a charm. They have a drill bit point at the tip which makes a pilot hole, and two wings to clear the metal shavings from the hole (which break off once used), and then they proceed to cut threads in the steel and screw themselves in. A real time saver!

Now I'm ready to cut the 2x4 sills and start laying out the stud locations.

Saturday, November 23, 2013

Floor insulation.

Next, it's time to prepare the trailer for the floor insulation. I started by vacuuming the bays, to remove all the leaves, dirt, etc.
Then, to make sure there won't be any water penetration from below (especially while driving on wet roads), I applied silicone caulk to all the seams. (I wiped them with an acetone soaked cloth first, to remove any grease or oil).
Here is the best caulk smoothing tool ever invented.
 I wanted to be thorough in the fight against water, so I caulked the fascia/trailer seams, and around the threaded rods as well.


The rigid foam insulation was recycled from a different project, so it came in pieces that had to be fit together in jigsaw fashion. I ripped each sheet on the table saw to the correct width for its bay (there were several different sized bays), then test fitted them for size.
Some of the insulation was too thick for the bays (which are 3" tall), so it had to be "planed". The method I arrived at, (with inspiration from LH), was to construct a jig with 3" tall walls, and cut across it with an antique 2 man saw. It took some elbow grease, but worked pretty well. (Sometimes, those old things in the barn are useful!)
The insulation was returned to the bays, and 5/16" shims were installed around the edges to maintain a space for the 1/4" nozzles of the expanding foam spray cans. The expanding foam will not only fill in the remaining voids, but also lock the rigid sheets into place.
 Weights were placed on the insulation to prevent the expanding foam from creeping underneath the sheets and lifting them (hmm, how do I know that might happen?) and then the perimeter of each bay was filled with spray foam.
It was colder than recommended for the application of expanding foam, so I borrowed a bucket of water from the hot tub to keep the cans warm.
The (nearly) end result:

I removed the excess foam, once cured, with a flat-bladed shovel after this photo was taken.
Next up: Sill seam, vapor barrier, and finally, plywood floor!